
 Previous

A good photo tells a story—it informs, amuses, or inspires people. Photos bring life to words and can convey a sense of what an event (or a club) is about at a glance.
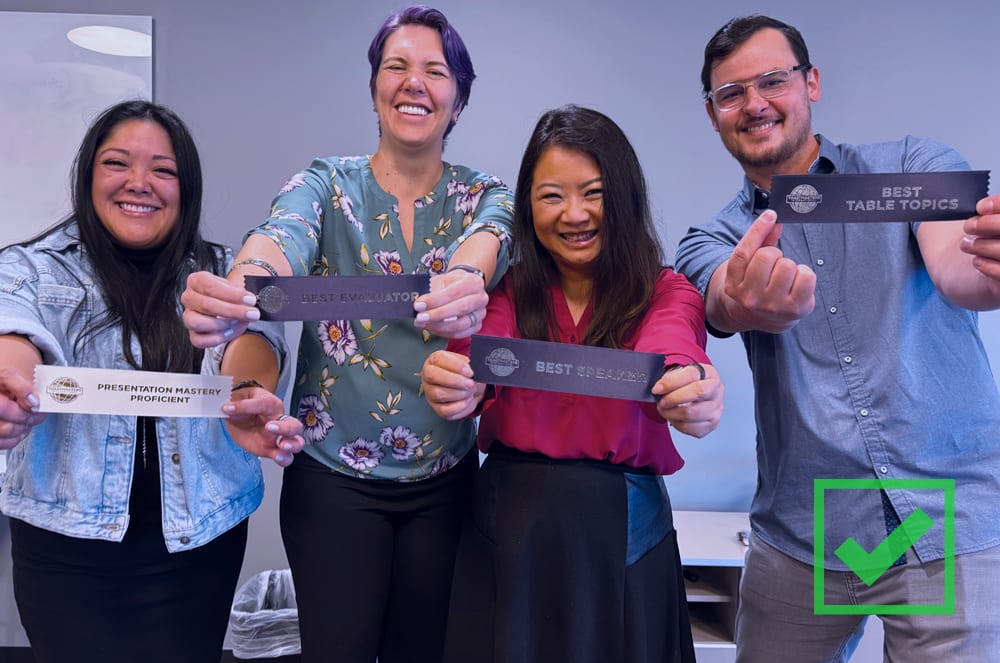
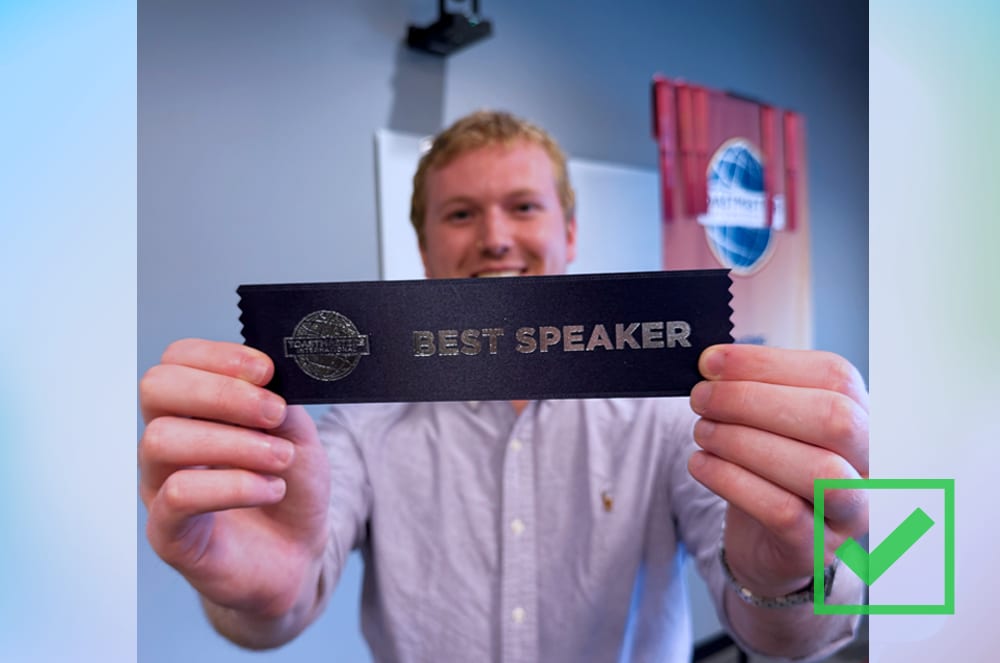
That is, good photos can do all that. Consider the image of two people shaking hands in front of a banner and then an image of two people with big smiles triumphantly showing their "Best Speaker" and "Best Evaluator" ribbons. Can you see how active, engaging photos inspire stronger reactions than static images?
If you want to take better photos—for personal use, for your club website or social media pages, or to submit to the Toastmaster magazine—read on for tips to make your photos come to life.
Club or Large Group Shots

DON’T: Line people up in
a
long row with no organization.
* Avoid everyone’s hands at their sides.
* Ensure everyone is looking at the camera and has open eyes.

DO: Line people in rows by
height.
* Bring people close together.
* Angle everyone toward the middle, and ensure all faces and eyes
are
clearly visible.
Pro tip: Take three photos in a row and use the best one. For posed photos, have everyone close their eyes, then say, "On the count of three open your eyes!" and snap the picture.

DO: Consider capturing your club as audience members.

DO: Consider capturing your club as audience members.
Smaller Groups


Hand Gestures

DON’T: Use hand gestures that may have meanings in other cultures. What is celebratory in one, may be derogatory in another.

DO: Use hand gestures with
international recognition, such as “jazz hands.”
* Show people smiling, laughing, and having fun.
Speakers and Presenters

DON’T: Try to capture your entire club if you just want a picture of the speaker.

DO: Make the speaker the focus
of the image.
* Take a shot of something happening rather than a still
image.
* Sit or stand as close as possible to the subject rather than
zooming in from a
distance.
DO: Use unconventional (and eye-catching) displays or poses
Background
DON’T: Have people stand in front of a cluttered or confusing background.

DO: Pose them in front of a solid background so the focus is on their faces.
Lighting

DON’T: Position people with their backs to the light source, such as in front of a bright window.
DO: Make sure the light source is shining on their face.

DON’T: Turn off the flash if the natural lighting of a room is dark.

DO: Use the flash so people’s faces are clearer and brighter.
Selfies
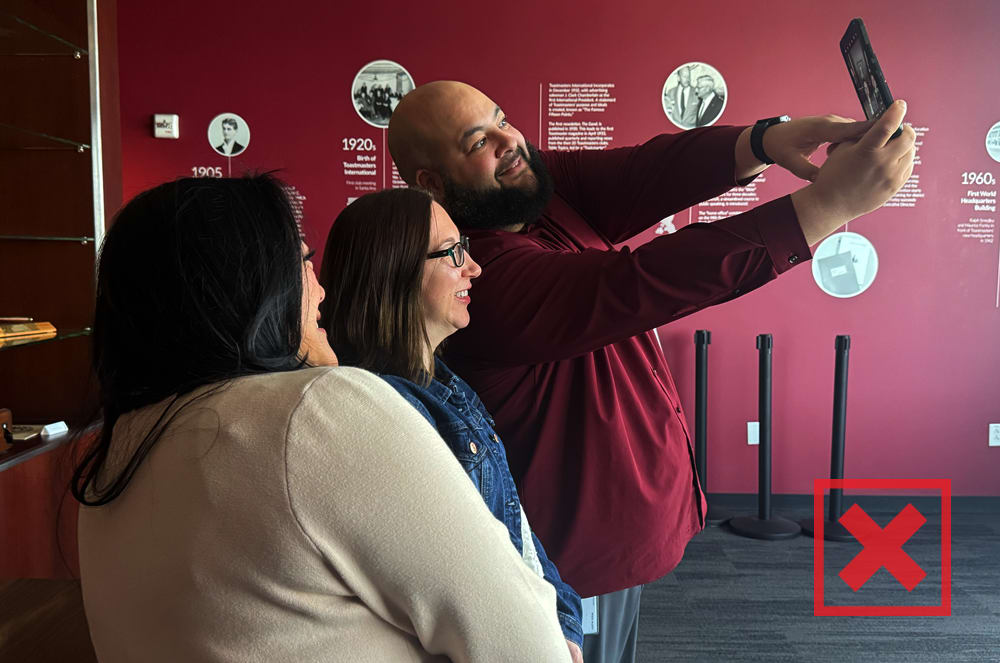
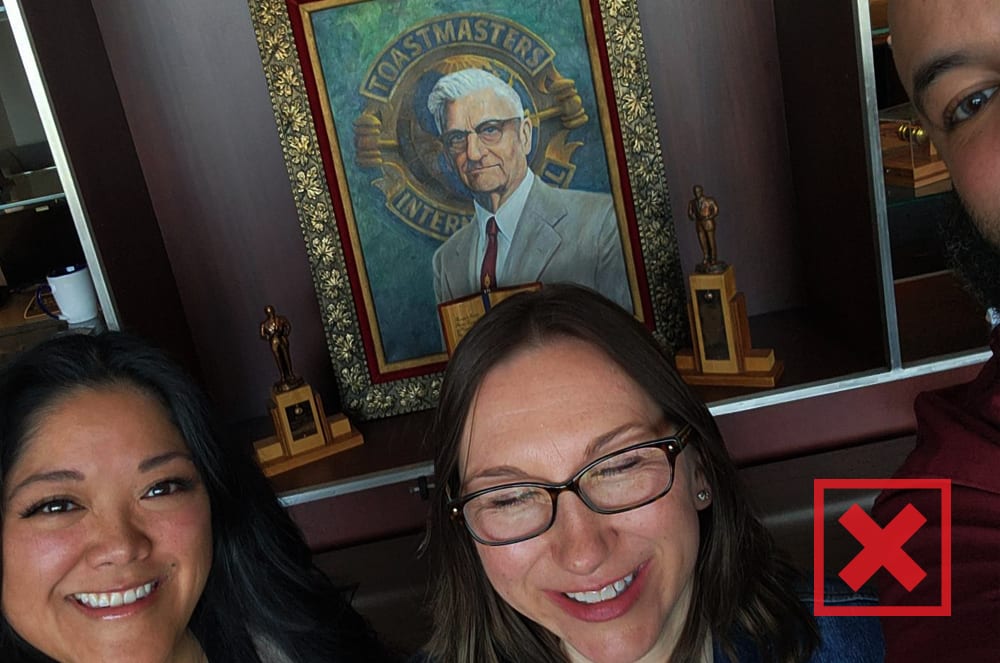
DON’T: Hold the camera
with the arm closest to the other people.
* Cover the camera with your finger.
* Look at the photo button instead of the camera.
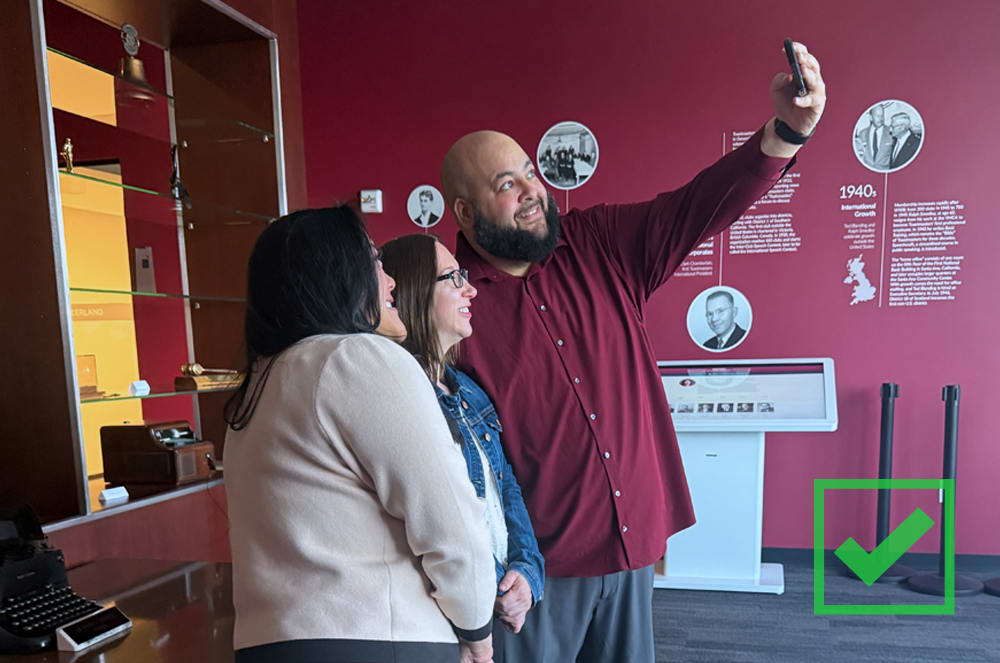

DO: Have the person with the
longest arm hold the phone with their outside hand.
* Stagger people so they aren't standing in a straight
line
* Make sure eyes are open and people are looking at the camera, not
the photo button.
Photo Tips from Professionals:
- People don’t need to be in a room. You can take shots in a park, outside your meeting space, or in a unique location.
- Cloudy, overcast days often have the best lighting. Bright, sunny days often leave harsh shadows and cause people to squint or blink. If it is a sunny day, reposition people as needed.
- To ensure the photo is level and not tilted, use a stable surface to prop up your phone (such as books on a table), or use a tripod and a self-timer.
- Fill the frame with your subject. To get closer, move yourself closer rather than zooming in with your camera as extreme zoom-ins cause pixelation. For best results, you should get closer than you think.
- Don’t be afraid to take a vertical shot—not everything needs to be horizontal.
- Use the lock focus feature on your camera phone to ensure that the subject is in focus. On most camera phones, you simply need to press and hold down on your screen over the subject you want to stay in focus.
- Look for interesting angles and framing. Taking the picture directly in front of the subject results in a static and boring photo. Try standing on a chair and shooting from above. Or position the subject in an interesting place.
- Get creative! If you’re taking a shot of one to three people in a beautiful setting, avoid positioning them in the center of the frame. Instead, position them slightly off center, which makes the image more natural and engaging (called “the rule of thirds” in photography). Most digital cameras have a grid that breaks up the image into nine quadrants. Place the most interesting or important elements near the corners of the gridlines.
Editor’s Note: If your club has some engaging photos, share them with the magazine for a chance to be featured! Details can be found on the Magazine Submissions page.

Share this article
 Photo Tips From Professionals
Bambi Cash and Blake Carver Bambi Cash is the graphic designer and event photographer, and Blake Carver is the senior video production specialist, for Toastmasters International.
Related Articles

Personal Growth
10 Storytelling Lessons From Photography

Toastmasters News